Thursday, December 30, 2010

Happy New Year......


Enough and more has been said about soups. Warms the body and comforts the soul. Equally popular among dieters and foodies. Technically an appetizer but can be tweaked to make it a main course dish.

Mercury has been dropping steadfastly and soups continue to hold forte at my dinner table. It is therefore obvious that my posts too would center around them. A soup and sandwich combo is also way easier to put together( with fewer dirty dishes at the end) than most other meals.

This time it is mushroom which I love in any form, pizza topping, as Chinese chilli, Indian curries, in pulaos. Actually in just about anything. The World though is clearly divided into two groups, those who love mushrooms and those who hate the vegetable. Thankfully for me even the boys love mushroom, in terms of popularity Broccoli tends to be a notch higher.

Mushroom Soup

Ingredients
Mushroom: 200 grams/one packet of mushroom, chop them fine
Onions: 2/3 medium sized ones chopped
Milk: 1 cup
Salt: To taste
Pepper: 2 tsps, freshly ground
Oil: 1 tsp

Method

Quite like how you make the Cream of Broccoli soup except that here you puree only part of the mushrooms.

Heat oil in a kadai, add the onions and fry till they turn glassy. Next add the mushrooms and fry for a few minutes.

Scoop out a little bit from this( about 2 tbsps) and puree it in a blender. Add it back to the kadai. Add one cup of milk and one cup of water. Give it a boil and then simmer on low. Add some salt and pepper to it. If you like your soup even thicker you could add a tsp of maida or cornflour to the same.

Serve hot.

Add some boiled, cubed chicken to the leftover mushroom soup, thicken it a little more with the flour and you have your very own Chicken Stroganoff, with hardly any effort.

This is my last post for the year. Wishing all of you a very happy food-filled year ahead.

Bon Apetit and Happy Cooking!


Sunday, December 26, 2010

Going Green....


Come Winter and soup becomes an integral part of our dinner menu. And when you are making a soup every evening you want it to both look and taste different from what you made the previous day. Variety helps make the meal more interesting, "soup of the day", becomes the topic of discussion around the dinner table( keeps the boys from squabbling) and these days provides 'fodder' for my posts. There are times when I get so excited with my new find that I forget to click a picture. By the time I realize this, it is all gone.


Typically a clear chicken soup works best for that stuffed nose and sore throat. Add some boiled noodles/wantons or vegetables to that and you have a complete meal.

When it comes to vegetarian soups the thick, creamy ones tend to be more popular. They have more body and are quite filling. You could make a thick soup with just about anything; potato, broccoli, mushroom, cauliflower, peas etc.

Broccoli soup is quick to make and has a rich, creamy texture. My husband insists I have added some cream when there really is none. As with most other soups this goes well with a warm salad and some garlic bread/soup sticks


Cream of Broccoli Soup


Ingredients

Broccoli: 1 small sized, cut into small sizes florets.

Milk: 1 cup

Onions: 2 medium sized, finely chopped

Salt: 1 tsp

Pepper: 1 tsp

Butter: 1 tsp


Method

Heat the butter in a kadai. Add the onions and saute till the onions turn glassy. Add the Broccoli. Saute for a while. Add the salt and pepper. Cover and cook till done. Allow it to cool down. Keep a few small pieces for the garnish and puree the rest in the mixie.

Put this mixture back on the stove. Add one cup of water and one cup of milk. Mix well and cook on slow flame for about 10 minutes. Garnish with the fried Broccoli and serve hot.

The soup looks a beautiful light green color and cues health. You could substitute the butter with some olive oil or any other refined oil.

There is nothing like a steaming hot bowl of soup on a cold winter night or a damp rainy one. It comforts from within. You feel its warmth as it flows down the throat and leaves you satiated. But if you were me, you would be asking for more.

Bon Apetit and Happy Cooking!


I strike GOLD.....


Yoo! Hoo! My 50th post. I have done it, I have done it, I have done it.

I had set myself a target of 50 posts before the year ended and here I am with my 50th.

Blogging is therapeutic( I am sure all my fellow bloggers agree) and food blogs are way beyond recipes, cooking and eating. They capture food memories, reminiscence about old times, connect up with friends, help you relax, inspire you to cook more, make you feel more confident to experiment etc. etc. etc. In short a happier me.

My focus when I started writing the blog were the recipes. Today I enjoy writing the food stories that accompany these recipes. The drama I create lets me relive a part of my childhood/youth or capture my present.

My post 'Yan can cook', 'Julie and Julia' were about my initiation into cooking. A few good laughs among family/friends about those initial disasters followed. A big Thank you to all those who patiently put up with my cooking and encouraged me to try harder. I am at it.

Comfort Food was all about comforting childhood memories( through food of course). Memories that invoke a sense of nostalgia and security even years later. They also remind me about my early exposure to cuisines beyond that of my own region.

I particularly enjoyed writing the post Quick Gun Murugan. It was different from my other posts not just by the conspicuous absence of a recipe but also( and more importantly so) it is a post that unites two different generations through food. My Dad and his fondness for Idlis AND my son and his love for the same. Dad passed away four years ago but it almost feels that a little bit of Dad's love for Idlis lives through my son.

For my Golden Jubilee post I shall write about yet another family favorite, Moussaka. I first sampled Moussaka at my friend K's place. K is a good friend and a wonderful cook. Someone who serves Patishapta (a traditional Bengali sweet) with a rich plum sauce and layers her cheese cakes with notun guder(jaggery) mishti doi( sweet curd). Over the years K and I have exchanges recipes, indulged in a lot of food talk but the one recipe that I instantly associate with K is Moussaka.

Moussaka is a three layered main course Greek Dish. Yes, the name does make you feel curious to know a little more but it is the taste, the combination of all those various flavors that tips the scales.

Moussaka

You could also make this with regular leftover keema cooked the Indian way.

Ingredients

Keema or mince: 500 grams
Onions: 2 finely chopped
Tomato puree: 3/4 tbsp
Garlic: chopped fine
Potatoes: 3/4
Brinjals: 1 large( Buy the bharta baigan which does not have seeds).
Oil: 1 tbsp( I use Olive oil)
Eggs: 2
Curd: 200 grams
Oregano: 1 tsp


Method

Boil the potatoes and cut them into thick roundels. Cut the Brinjal into thick roundels and shallow fry them with a little bit of salt.

Heat some oil, add the finely chopped onion, fry till the onion turns glassy. Next add the garlic and fry for a few minutes. Add the keema and saute for 4/5 minutes. Next add the tomato puree, salt and oregano and continue to cook. Cover and cook till done. With very fine mince this should not take more than ten minutes. Please note that the mince would also get cooked after you have assembled the dish and put it in the oven to bake.

Once the mince is done start layering the dish. Use a deep bottom dish as there would be six layers in all. Use potato as the bottom layer, top with brinjal and then the cooked mince. Repeat. Do not press the layers down. There should be some gap for the egg and curd mixture to seep through.
Next beat the curd and egg with some salt and pepper. Pour over the potato, brinjal and mince layers. Allow it to settle down.
Bake at 200 degree centigrade for 30/45 minutes with both upper and lower coils on. The dish should brown lightly.
Serve it with a clear soup and some garlic bread/bread sticks.

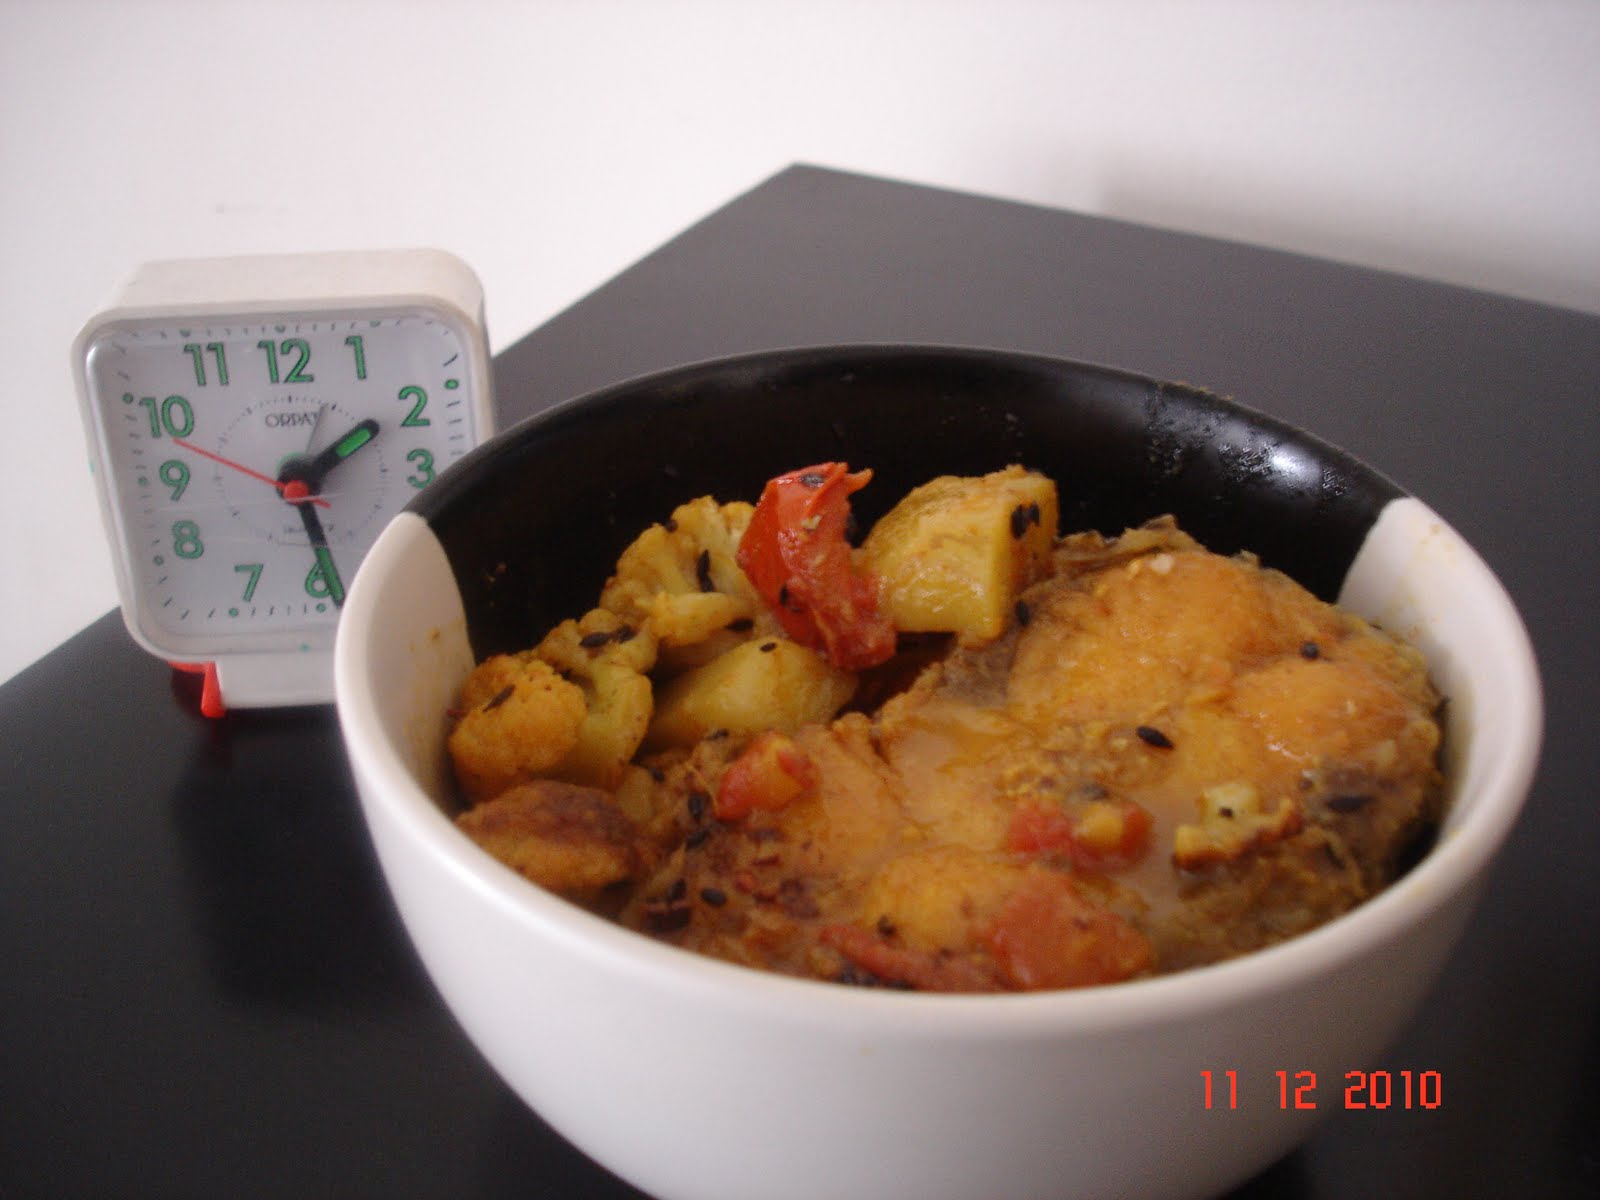
Note: It definitely tastes better than it looks in the picture. I am working on my plating and photography skills. Please bear with me

If making it as part of your entertainment menu, I would recommend making the mince/boiling the potatoes and shallow frying the brinjals a day earlier. You could assemble and set the dish to bake about an hour before your guests are scheduled to arrive.

Like I mentioned earlier my family loves Moussaka. Come to think of it most of my other blog posts are also family favorites. That makes us quite a foodie family, doesn't it? They are my constant inspiration to try out new dishes. This week, it has been a hattrick. My new finds include Pinacorn salad( even a variation with some french beans, boiled pasta and cubed paneer), Mushroom soup and Tom Yam Soup(made from scratch and with lemon grass from my kitchen garden).

Bon Apetit and Happy Cooking!

P.S: Hope to upload 100 posts over the next one year. So wish me good luck. Cheers!


Saturday, December 25, 2010

What's in a name....? With apologies to William Shakespeare


"What's in a name? That which we call a rose by any other name would smell as sweet." (Romeo and Juliet)

I am sorry but this Shakespearian logic definitely does not extend to food. As with 'plating' or presentation of a dish, the name definitely heightens interest.

I have often noticed that the more complex the name, the more intrigued you are about the contents of the dish. So if you were to tell a group that you were making Moussaka the response would be Wow! and then quickly followed by "Hey, but what is that?" Would you have got a similar response had you for example said I am making Keema Alu Baigan( the key ingredients of Moussaka).

When it comes to naming their dishes the French take the cake( with the icing). Creme Brulee, Mango Gateux, Crepes Sucrees and so it goes on. Just hearing these names makes me do a flip and I go awesome. But unless you are into food or French, you would at a restaurant call the steward point to the dish in the menu card and say: "I want one of that."

The Mughals too have done well for themselves when it comes to naming their food. The names are so attractive that you are very often tempted to try out the dish. Nargisi Kofta, Dum Murgh, Murgh Noorjehani, Shahi Kaju Aloo(Prefix any dish with Shahi and complexion changes) and so on. Some names also have associations with either a person or place or event and thus more character. Ledikeni is a Bengali sweet that was created for Lady Canning to celebrate her birthday.

I was at a cousin's place last week and the menu included a corn salad. American sweet corn dishes are gaining popularity ever since the Modern Trade outlets started stocking them. Now they are also available quite easily at your local vegetable shop. The salad looked interesting, tasted really nice but it was the name that finally did the trick. It was called Pinacorn salad. There was an exotic feel to the name, a certain lilt to it. So some quick sms exchanges, some searches and the dish made its way to our dinner table soon thereafter.

Pinacorn Salad

Ingredients

American Sweet Corn: 200 grams

Tinned pineapple slices: 2/3

Walnuts: 3/4, crush them with your hand

Lettuce: 1 bunch( tear half to add to the salad and use the rest for the garnish)

Thousand island dressing( you could also make this by mixing tomato ketchup and finely chopped onions to some mayo): 2/3 tbsp. I use the brand Cremica.

Method

Mix the ingredients together. Layer the serving dish with some lettuce. Serve the salad on this bed of lettuce.

I am told this salad stays well for a long time so if you are having people over for dinner you can make this well in advance. Would also be good as a lunch box option. The salad has a nice sweet and sour taste. The walnuts and lettuce give it a nice crunchy feel.

A great tasting salad without the usual mess of peeling and chopping.

To make this a complete meal you could add a handful of boiled pasta and some blanched tender beans.

Bon Apetit and Happy Cooking!

P.S: Watch out for the Moussaka post. This one tastes as good as it sounds :-)


Thursday, December 23, 2010

Queen of hearts....


Food is indeed a great way to connect. There has been a heightened interest in food among my boys ever since I started blogging. The older one says " Mom your food tastes better than it looks, you need to work on your 'plating skills'" . "The younger one adds " Mom you should join Master Chef Australia. It is really very simple, they demonstrate a recipe and you have to make the same one. Monkey see monkey do, SM see SM do". This new found wisdom and the accompanying jargon I am told is courtesy the various cookery shows that they have been watching. Inspired by all the food talk around me I continue to create drama around the kitchen and the recipes.

There was a Christmas bake sale at school recently. We as parents were asked to send home-make cakes/bakes/snacks for the same( I must quickly add that the contributions were voluntary). Gave me the perfect opportunity to bond with the boys and get brownie points from their teachers for being an involved Mom. The first rule of the Foodie Club: I shall always use food to my advantage. So two Raindrop cakes(refer blog) and some bite-sized sandwiches it was for the sale.

Sandwiches cut into different shapes make interesting lunch boxes. This is also an easy way to introduce your child to the World of shapes. So together we made these sandwiches and they got sold in packs of 5 for Rs.5/ They were almost gone by the time I reached the fest.

I had made a batch of chutney sandwiches and another batch of apple n cinnamon sandwiches. Always remember to keep some chutney handy in your refrigerator and use it as a sandwich spread, mix it with some hung curd to get a flavorsome dip in a jiffy, spice up gravies. The opportunities are endless.


Mint Chutney

Ingredients
Green Corriander: 1 cup
Fresh Mint: A few sprigs
Green chillies: 1/2( skip if making the chutney for children).
Salt: 1/2 tsp
Sugar: A pinch
Ginger: 1/2 an inch chopped fine

Method
Grind together into a thick paste. Use as required.

I used White bread for the sandwich. Most children prefer it over brown, it also contrasts better with the green chutney. Butter the slice, add one layer of chutney. Cover with a second layer. Use the cookie cutter to cut the sandwich into different shapes.

For the apple and cinnamon sandwich just substitute the chutney with apple and cinnamon jam.

Serve immediately or pack in the lunch box.

The heart shaped sandwich is my personal favorite . Goes well with the Christmas spirit too.

I had a lot of fun making these sandwiches and watching those little devils gobble them up.

"In my experience, clever food is not appreciated at Christmas. It makes the little ones cry and the old ones nervous." Jane Grigson

On that note Merry Chirtmas!

Bon Apetit and Happy cooking!


Wednesday, December 22, 2010

A twist to the tale...

After cooking for over a decade most recipes tend to have a familiar ring to them. A feeling of 'been there done that' many a times. Like Chicken curries are likely to be dahi based or tomato based, pastas are cooked in white sauce, a tomato base, or just tossed around in olive oil, basic daals would either have a jeera or rai/mustard tadka and so it goes on.

YET, the mere addition of even one new ingredient or varying the proportion of the ingredient or adding it during a different stage in the cooking changes the complexion entirely. This fact gets reinforced each time I make an Indian chicken curry. Almost the same ingredients- tomato, onion, ginger, garlic, dhania powder, jeera powder, garam masala but a very different end result each time. Dhania Chicken, Elaichi Murg(refer blog) to name a few, have varied tastes. Even with the dahi based chicken dishes whether you marinate the chicken in the dahi or add whipped curd towards the last stages of cooking would impact the texture, consistency and taste. Ditto for dhania patta which when added towards the end as the garnish enhances the sensorials but when added earlier on adds to the taste and richness of the gravy.

Carribbean chicken which I cooked last week uses more or less the regular chicken curry ingredients. This is a wonderfully seasoned chicken. Although continental in terms of categorization, very Indian in taste. Jai Ho!

So ladies and gentlemen presenting...

Caribbean Chicken

Ingredients

Chicken: 800 grams
Onions: 2 large, sliced
Oil: 2tsp
Garlic paste: 2 tsp
Soya sauce: 4 tbsp
Salt: 1 tsp( go easy on the salt given that you are adding 4 tablespoon of soya sauce)
Chilli powder: 1/2 tsp. The chilli powder in combination with the soya sauce and tomato puree gives the dish a rich red color)
Tomato puree: 4/5 tbsp

Method

Heat oil in a pan and saute the onion till pink/glassy. Add the chicken and fry till the chicken changes colour. Add the garlic paste and fry for a couple of minutes. Add salt, red chilli powder,tomato puree. Cover and cook till the chicken is tender. Increase heat and thicken the sauce. Sprinkle fresh corriander leaves.
Serve hot.

This goes well with a pulao and is a convenient dish to make when you are entertaining. Likely to have a wide appeal given its Indo-western feel.

Sorry no pictures. My boys invited a friend home and together they polished it all off. I am not complaining, the proof of the chicken.

Happy cooking and Bon Apetit!

P.S: A Raindrop cake is baking as I write this post. The smell of freshly baked chocolate cake is a mood uplifter. I am starting to feel like Maria, I simply remember my favorite things and then I don't feel so sad.

Monday, December 13, 2010

Ubiquitous Sandwich....


It is amazing when you think of the number of different types of sandwiches you can make, with two slices of bread. Just about anything can do for the filling. Last night's rajma ground to a fine paste or chicken curry remains or freshly sliced cucumber and tomato, put them between two slices of bread and it technically qualifies as a sandwich. A wee bit of imagination and the sandwich possibilities are endless, from basic chutney sandwiches( butter and green chutney) to more exotic grilled ones. Together with a soup they make for a complete and satisfying meal.

As children we carried sandwiches in our lunch boxes or on picnics, consumed them out of home. When Mom ran out of the regular sandwich ingredients she made them with ghee and sprinkled some sugar on top of it. I quite hated that combination. I preferred the ones with butter, cheese, eggs, sausages. Today, I use most leftovers as sandwich filling. Add some grated cheese, sprinkle some pepper, grill it and you get a great tasting sandwich. They are great as a breakfast option(filling can even be made from the night before and quickly assembled), as an in between snack or as a complete meal with a salad and soup.


Salami Sandwich

This is a fairly basic sandwich and uses egg, tomato, chicken salami in equal proportion. Have called it salami sandwich as that was my inspiration for the sandwich today. The rest of the ingredients got added along as I worked my way through the sandwich.

Ingredients

Brown bread: 8/10 slices
Chicken Salami roundels: 16 thin slices( try and get some fresh slices, those taste way better than the frozen ones)
Eggs: 2 hard- boiled, sliced thin
Tomatoes: 2 medium sized ones, sliced thin
Olive oil: 1 tbsp
Rosemary: 1 tsp
Salt: to taste
Freshly ground pepper: 1 tsp
Eggless Mayonnaise: 2/3 tbsps

Method

Lay out all the ingredients before you start. Next heat some olive oil, add some rosemary and salt to it. Drizzle the oil over the tomato slices to give them an added flavor and taste.

Lightly toast the bread. Spread some mayo on the bread slices. Arrange the salami, egg and tomato slices over it. Sprinkle some salt and freshly ground pepper over it. Cover with another slice. Cut into triangles and serve with a hot clear soup.

Alternately you could also mash the egg, add the mayo, salami bits and tomato to it and use as the filling. Add a little milk to the egg as you mash it( a tip I learnt from one of my Bong friends), helps the sandwich stay really soft even hours later. Great for picnics and parties.

Bite sized sandwiches work well as starters. Sis passed on a recipe where chutney sandwiches are cut into small pieces and then given a seasoning of curry leaves and mustard in oil. You can substitute the chutney with a pickle masala.

And then of course there are open sandwiches which in essence are mini pizzas. Mushroom, capsicum and cheese topping is the more popular variant but you could make them with a host of other ingredients like sweet corn, potatoes, shredded chicken, mince etc.

Sandwiches are also great when you want to organize a " do it your self " party. You provide different spreads and fillings, people make their own sandwiches. It is a lot of fun and one ends up discovering some new combinations. There are some like my friend S who invariably opt for "all of the above" either together or in combinations thereof.

It is always a good idea to keep a loaf of bread, some eggs and soup sachets handy. You can dish up some interesting sandwich combos in a jiffy.

Happy cooking and Bon Apetit!

Sunday, December 12, 2010

Comfort Food....


Food they say is the most primitive form of comfort. Every family has their own comfort food recipes. A quick survey throws up some names, "dhuli moong daal khichdi with achar", "rice, daal and mashed potatoes", " bread with chicken stew", "konji". etc. What is common across these seemingly varied dishes is that they are typically home-cooked, warm, filling, unpretentious and provide easy satisfaction. Most of them use very few ingredients, are quick to prepare and help you achieve an improved emotional status. Just what the Doc ordered on a day you were feeling low or stressed or home-sick or nostalgic.

Growing up in a small though cosmopolitan town my early food memories (apart from the dishes that got cooked in my home) are of those that got cooked in my neighbor's kitchens. So it was Kumar aunty's Rajma, Murty's aunty's idlis, Smith aunty's vindaloo, Padmanabhan aunty's sambhar, Nanda aunty's cakes, Mohanty aunty's malpuas.....I could go on and on. Food that reminds me of comforting childhood memories. Most of this food is far from gourmet but invokes a feeling of nostalgia and security. They also make for good food stories and help us children connect even years later. Incidentally Mom managed to learn almost all of these dishes with a little help from the lovely ladies mentioned above and soon they got cooked in our kitchen too. But always referred to by the names of their original creators/disseminators. In the pre-cookbook/pre- cookery shows days recipes traveled through word of mouth and personal demos. There was a lot more of active sharing.

Macha Jhola is one such comfort food for me. While this is a commonly cooked dish in any Eastern household, the recipe varies slightly from household to household. Like some I know would skip the ginger, others might replace tomatoes with dried mango( Ambula), some others might make it sans the vegetables. But whichever way you cook it, it sure comforts.

Macha Jhola

Ingredients

Fish: 1/2 kilo Rohu
Potatoes: 2/3, cubed
Cauliflower: 8/10 florets( cut the same size as the potatoes)
Ginger: 1/2 inch, grated fine
Tomatoes: 2, chopped fine
Chilli powder:1/2 tsp
Turmeric powder: 1/2 tsp
Jeera powder: 1 1/2 tsp
Dhania powder: 1/2 tsp
Whole Jeera: 1 tsp
Mustard Oil: 2/3 tbsps( includes the oil needed to fry the fish)
Garam Masala: 1 tsp( freshly prepared by pounding together 4 small elaichi and about 1/2 an inch long cinnamon)
Bay leaves: 2

Method

Smear salt and turmeric on the fish pieces and keep for about 10/15 minutes. Heat the oil and once the oil begins to smoke add the fish and shallow fry for a few minutes. Remove and keep aside. The fish should be a little soft.

Into the same pan add some whole jeera and the bay leaves. Once the jeera begins to sputter add the cubed potato and cauliflower florets and fry for a couple of minutes. Mix the dhania powder, jeera powder, turmeric powder, chilli powder, grated ginger in about half a cup of water. Add it to the potato and cauliflower. Add the tomatoes. Saute for a few minutes, till the masala coats the vegetables. Add two more cups of water to the dish and allow the gravy to come to a boil. Add the fish pieces and let them simmer. Finally add the garam masala.

Goes best with some plain rice. The vegetables along with the fish make this a wholesome and balanced meal.

"From morning till night, sounds drift from the kitchen, most of them familiar and comforting....On days when warmth is the most important need of the human heart, the kitchen is the place you can find it; it dries the wet sock, it cools the hot little brain."
E.B. White

Happy Cooking, Happy Comforting and Bon Apetit!

Saturday, December 11, 2010

Going Bananas........


It all started with the Zucchini my Mom planted . In six weeks (Mama has a green thumb) the plant had grown really big and there were nice yellow flowers. They looked deceptively similar to pumpkin flowers. Back home batter(rice batter) fried pumpkin flowers are a delicacy and help spice things up. A favorite of my husband.

Rice batter(unless you have rice powder handy) needs some effort and planning(soak the rice for a couple of hours and then grind to a paste). An inventory scan, some quick thinking and an easier option. Tempura, the wonder batter to the rescue(SIL had given me a packet that was lying unused in my refrigerator). I made a batter of tempura, chili powder, salt and water. Dipped the Zucchini flowers into them and shallow fried the same. They were crisp and tasted delicious. Alas they did not live long enough to tell their visual tale.

Encouraged by the enthusiastic response I decided to get a little more experimentative. Thought I would delight the family with a quick dessert. So I made some more tempura batter but this time sweet, with some sugar, milk and vanilla essence. I dipped some ripe banana roundels into them and shallow fried.

Banana Fritters

Ingredients

Ripe Yellow Bananas: 2
Tempura: 2/3 tbsp
Milk: 1/2 cup
Vanilla essence : 1/2 tsp
Sugar: 1 heaped tbsp

Method

Cut the banana into roundels. You could also halve the banana and then cut vertically/along the length to get your slices.

Prepare a batter by whisking together the Tempura, milk, sugar and vanilla essence. Use an egg beater to even out any lumps that may have formed.

Dip the banana pieces into the batter and shallow fry.

Serve hot. Tastes like Malpua, only much easier and quicker.

You could drizzle some honey/maple syrup over it or serve it with some rabdi( sweetened, thickened milk). We had ours plain on a cold winter afternoon. Helped perk up an otherwise insipid meal

Bon Apetit and Happy Cooking!

Monday, December 6, 2010

Quick Gun Murugan............

I have a confession to make. I have not seen the movie. My sons tell me that in the movie Rice plate Reddy kidnaps mothers because Mother's love is the secret ingredient of good dosas. But this mother cannot make good dosas( love you guys but despite that, look at the silver lining Reddy would spare me). Mother's love in plenty but for dosas we head to Sarvana Bhawan or Sagar Ratna.

My younger one was born in Chennai and proudly calls himself a Tamilian( he is definitely one by deed especially in his palate preferences). It was really convenient for me to make him Idli/dosa in Chennai. Just buy the "Mao"( no Chinese connection here, refers to the Dosa batter) and you are good to go. Now I am sure most of you( and my Mom included) would say that making the batter is no rocket science. Soak uradh dhaal and boiled rice separately, grind them separately and mix them together. After getting used to Thaiyar Mao this seems like too much effort. Also a few half hearted attempts have met with little success( the idli turns out to be hard and the dosa tends to stick to the tawa). I know I should be ashamed of myself as I come from a family where Idli/Sambhar was staple breakfast diet twice a week. Ground at home on a grinding stone my Dad had lugged all the way from Kakinada. In fact our household help had to get specially trained by our sweet Tamilian neighbour in the process of grinding(Thank God for small towns and their community living).

So South Indian breakfast it is for my kids every once in a while(probably our only eating out occasions). For the younger one it is possibly the best treat you can give him. His face lights up at the very mention of Sagar Ratna, the best South Indian joint this side of the toll gate.

This Sunday, the weather was lovely as we drove to Sagar Ratna. An empty restaurant greeted us as always. We had our usual discussion/argument about the popularity of South Indian cuisine among the people of Gurgaon, the number of South Indians in Gurgaon to help explain the poor turnout. I of course stuck to my logic of how any self respecting South Indian would not come to a restaurant to eat Idli/dosa, they would always make it at home. As I was vehemently arguing a South Indian family entered(let me be specific, a Tamilian family entered) and sat on the next table. My husband smirked and said : I rest my case.

We started with our usual Idli Wada rounds. The Idlis were soft, fluffy and nice. Wadas are crisp on the outside and soft on the inside, just the way we like it. They are served with Sambhar and three kinds of chutney: an onion chutney, a coconut chutney and a green corriander and coconut chutney. I would recommend the onion chutney. On days that we feel a little more self indulgent we also ask them to get us ghee and malgapodi. The first time we asked for malgapodi the waiters drew a blank. I strated describing it and finally they got it. Oh! you mean gunpowder. Some fiery gunpowder mixed with warm melted ghee tastes yumm! Dip those soft idlis into it and you are sure to attain nirvana.

After the Idli wada we move on to the dosas. Paper masala dosa for me, Regular masala dosa for my husband, Plain dosa for younger son and Ghee roast dosa for the older one. The dosa arrives with more varieties of chutney and bowls of Sambhar. Dosa is crisp and there is sound of silence around the table as we all tuck in greedily. My husband finishes the meal with Filter Kapi(Coffee). I wait to get home to have my Darjeeling.

We head back satiated. What a perfect beginning to the day.

Bon Apetit and Happy Cooking!

P.S: This post is for you Papa, who loved his Idlis more than anybody else I know.

Sunday, December 5, 2010

Cooking for vegetarians....


If you have vegetarians coming for a meal you can be sure that Paneer/cottage cheese will be a part of the main course. More so if they are from the Northern part of India where paneer is eaten as curry dishes. When I think of paneer I am reminded of my early Chemistry class, " takes the form of whatever it is added to" or the popular Hindi song( from my era) which goes: "Jisme milao tu usi ke jaisa". Paneer can take any shape or form and therefore the list of paneer dishes is really endless. In fact there are cookbooks dedicated entirely to Paneer. You have the regular Palak Paneer/Methi Paneer/Butter Paneer/Malai Paneer which jostle for space among their "international counterparts" like Chilli Paneer, Paneer Manchurian( Yes, the Chinese have taken over our lives in more ways than one, I am told Mandarin will now be introduced as a language in our schools), grilled paneer, paneer in white sauce, paneer moussaka etc.

In the East the use of paneer(referred to as chhena) was earlier restricted to sweets.When making sweets, Paneer is drained but not pressed, so that some moisture is retained, which makes for a soft malleable consistency. Now of course Paneer curry dishes know no boundaries. All pervasive.

While some vegetarians I know are tired of being served Paneer this one I promise is a little different. It uses very few ingredients and gets done real quick( under 10 minutes).

Achari Paneer

Ingredients
Paneer: 200 grams
Onion: 3 Medium sized onions, sliced fine
Panch Phoron: 2/3 tsps( saunf, mustard, nigella, jeera, methi in equal proportion)
Hing: A pinch
Oil: 1 tsp
Curd: 3/4th cup
Maida: 1 tbsp
Chilli powder: 1 tsp
Turmeric powder:1/2 tsp
Black salt powder: 1 tsp(I used Roopak Shikanji Masala instead of black salt)
Salt to taste( go easy on the salt as you are also using black salt)
Corriander leaves: 1/2 cup
Sugar:1/4 tsp

Method

Cut the paneer into cubes and soak for sometime in luke warm water(this helps soften the Paneer, a must if using Paneer that has been stored in the refrigerator for a few days).

Heat the oil, add the Hing once the oil heats up. Then add the Panchphoran and let it sputter. Add the onions and fry till they are glassy. Add the paneer, chilli powder, turmeric powder and black salt. Mix the spices. Next beat the curd with 1 tbsp of Maida( to be on the safe side I add a pinch of sugar, prevents the curd from curdling). Add to the dish. Mix together taking care not to mash the paneer.

Add finely chopped corriander leaves and serve hot.

Goes best with hot rotis.

With leftover Achari Paneer you can make paneer parathas. They taste yumm!

Bon Apetit and Happy cooking!

Saturday, December 4, 2010

Kahani thodi filmi hai....

I was reminded of a really old ketchup ad when I was making these Mini Pizzas. The ad goes something like this....there is this grown up kid who walks in and tells his Mom in an anglicized voice: Aaj khane main kya hai( what's cooking today)? And wrinkles up his nose when he finds his Mom making Parathas(read traditional food, not " so cool"). So the smart Mom takes the paratha, smears tomato ketchup over it, layers it up with some cooked veggies, grated cheese and in the same tone says : Pizza..Paratha Pizza! And the kid gobbles up the food.


Kids are taken in by the overall presentation and one needs to package the dish to them( Calvin eats up his greens because his Mom tells him that he will turn into a mutant if he does so- Moms are always so smart :-), they know just how to get things done).

Pizzas offer an easy ways to slip a lot of vegetables into your child's food. And for once he does not grumble, yes mummy/tummy dono khush.

Desi Pizza

Ingredients

Pizza bases: 6
Tomato ketchup: 6 tbsp
Vegetables: Any leftover vegetables will do, try and use beans, carrots, mushrooms, peas etc.
Oregano: 3 tsp
Mozarella Cheese
Capsicum: 1/2, cut into thin strips
Onion: 1, chopped fine(optional)

Method

Quite like the ketchup ad Mom. Smear tomato ketchup on the Pizza bases, add the vegetables, top with onion, capsicum, oregano and finally the grated cheese. Bake for about 5/10 minutes
Serve HOT.

Adults seem to love these Pizzas too. That reminds me of another ad line Bache to bache, Baap re baap.

Bon Apetit and Happy Cooking!


Do it sweet.....

Chutneys help spice up an otherwise boring meal. There is no limit to the number of chutneys and they can be made from any vegetable/fruit/herb/spices or a combination of them. My Mom recently made a chutney where she combined some sweet grated mango chutney with some hung curd and a handful of fresh mint( from my kitchen garden). Possibilities are endless really(like everything else) and most chutneys also double up as sandwich spreads, dips. I have even added leftover pudina/dhania chutneys into gravies to spice them up.

Tomato chutney or Chatni as it referred to is the most common form of Chutney in the
Eastern part of the country. A quintessential part of Bengali wedding menus. The elaborate wedding menu usually finishes with tomato Chutney and papad. You literally lick your fingers to the finish. The best way to enjoy this chutney is to savour it bit by bit, to let the sweetness with a tinge of sour pervade through your senses.

Adding Aaam Papad( or Aaam Shato as it is called in Bengali) or Khajur makes the chutney more flavorsome. Aam Papad adds body to the chutney and gives it a nice sweet and sour taste.


Tomato Aaam Papad Chutney

Ingredients
Tomato: 1/2 kilo, medium size tomato
Aam papad: 5/6 cubes, chopped into small bits
Sugar: 4/5 tbsp
Salt: To taste
Panch Phoran: 1 tsp(Panch phoran is cumin, fennel, nigella, fenugreek, mustard seeds mixed in equal quantity)
Oil: 1 tsp
Whole Jeera: 2 tsp

Method

Heat oil in a kadhai. Once the oil heats up add the panchphoran and let it sputter. Next add the tomatoes and cook till they soften. Add the sugar and let it dissolve completely. Add the salt. Finally add the aam papad. Dry roast the Jeera seeds and coarsely grind them. Sprinkle it over the chutney. Let the Chutney cool. Store in the refrigerator.

Serve cold.

Chutneys stay well for days and are healthier than pickles( which tend to be high on oil, that killer salt and spices). Ideal when you are entertaining as you can make it a day or two early.

Bon Apetit and Happy Cooking!


Friday, December 3, 2010

Luck of the pot.....


Pot luck dinners are quite popular with some of our friends. While writing this post I found out that the etymology of the word pot-luck appears in 16th century England, and was used to mean "food provided for an unexpected or uninvited guest, the luck of the pot". Interestingly to the Irish, a potluck was a meal with no particular menu. Everyone participating brought a dish for all to share. The term comes from a time when groups of Irish women would gather together and cook dinner. They only had one pot so they cooked the meal together with whatever ingredients they happened to have that day.
For me and my friends Potluck is a convenient way to have a lot of fun. Each one of us gets a dish or two so that the hostess does not have to spend all her time in the kitchen cooking/managing refrigerator space/managing household help motivation etc. I also find that when each one of us gets a dish, everything tastes really nice. A lot of effort goes into every individual dish unlike the case where you are preparing an entire meal and your attention gets divided among several dishes. Then you are a little partial to some of the dishes as compared to the others. At the end of the potluck everybody carries back a little bit of the leftovers (other one's dish) for the next day so as the host you don't end up eating the same food over the next three days.

I was at one such dinner last weekend and had made some dhaniya chicken. It is a really easy, no oil dish. Goes well with Roti/Paratha as well as Pulaos. You can make this dry or a leave a little gravy depending on your own individual preference.
I had first sampled Dhaniya Chicken at Barbeque, Calcutta. In fact a friend of ours always ordered this dish. I never got around to getting the recipe from the chef, later discovered this version in a cookbook.

Dhaniya Chicken

Ingredients
Chicken: 1 kilo
Tomato Puree: 1 cup( use 1 tetrapack if using the bought one)
Dhania powder: 1/2 cup, this is the predominant ingredient
Red chilli powder: 1 tsp
Garam Masala: 1 tsp( I use the Roopak Garam Masala which is coarsely ground)
Salt: 1 tsp or to taste
Sugar:1/2 tsp
Ginger garlic paste: 2 tsp
Sugar: a pinch
Corriander leaves: 1 cup, finely chopped

Method
This is the part I like the best. It is just one step. Almost like baking with the additional advantage of tinkering with the dish half way through.
Mix all the ingredients( except the corriander leaves) together, add a cup of water. Bring the gravy to a boil and let it then simmer covered for about 20 minutes/till done( stir occasionally). Switch off the stove, open the lid and add the corriander leaves and mix well. Serve hot.

There was so much of food going during the pot luck dinner that we did not end up eating most of the main course. My friend tells me that the chicken tasted good and I shall shamelessly take her word for it. Inspired me to blog about it.


Bon Apetit and Happy Cooking!