Sunday, September 26, 2010

The 32nd Milestone


The name of this post is inspired by a 'hip and happening' place in Gurgaon by the same name. This is my 32nd post( so the name is relevant, literally and figuratively) and I am quite delighted that I have managed to upload 31 recipes and food stories in the last one year. Being a foodie I find blogging about food therapeutic. "The more I cook the more I blog, the more I blog the more I cook", yes, it is a vicious circle but me is not complaining.

My son feels that I should put up something really nice as my 32nd post( given that I have created so much of drama around the name, this one ought to be a little different).

So presenting Murgh Kali Mirch, sheer indulgence. Though it is very easily made the lean way and that is how I usually make it. Had sampled a version of it years back at my friend S's place. Had loved it then and wished there had been a little more gravy for me to lick. This one makes you want a little more.
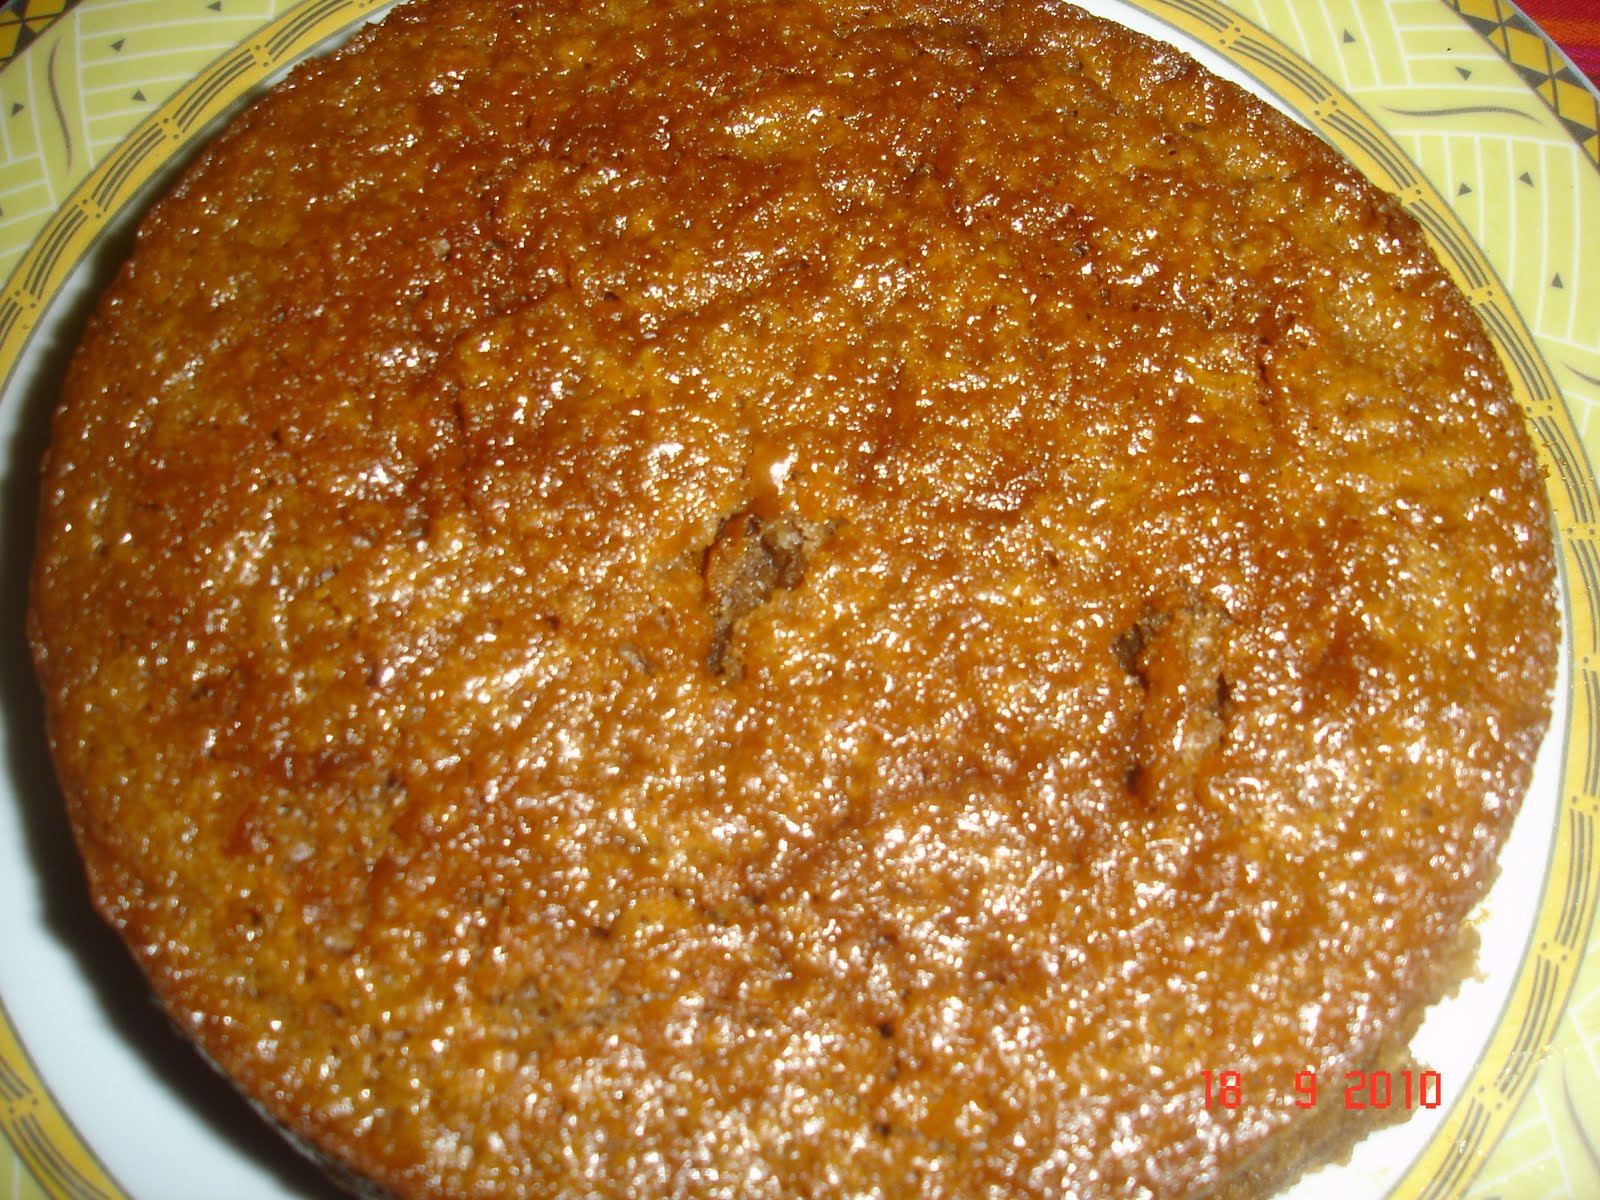
Murgh Kali Mirch

Ingredients

Chicken: 500 grams( I prefer to cook chicken with the bones, pieces turn out to be more succulent as compared to the boneless version. I reserve the boneless ones for Salads, Pasta, Sandwich spreads etc. where you just can't have it any other way)
Onion: 2/3 medium sized onions chopped fine
Hung curd/Thick Dahi: 4/5 tbsps
Whole pepper: 8/10 pods( this dish calls for freshly ground pepper as pepper is the predominant spice)
Whole garam masala: 2 green cardamom and 1 inch stick of cinnamon( grind them with the pepper).
Ginger-Garlic paste: 1tbsp
Salt: To taste, about 1 tsp
Sugar: 1/4 tsp
Ghee/oil: 1 tbsp
Cream(Optional, but let me tell you that this is one dish where cream makes a difference to the consistency and taste. So maybe just this one time you can add the cream): 1 to 2 tbsp
Green corriander: 1/2 cup, finely chopped

Method

Beat the curd with salt, sugar and the ginger garlic paste( adding a bit of sugar to the marinade ensure the dahi does not curdle on heating). Add the chicken pieces(prick the pieces with a fork for the chicken to soak in the marinade). Keep the mixture in the refrigerator and let it sit for at least 4/5 hours.

Heat a cooking pan and add the oil/ghee. Once the ghee/oil gets heated up add the onions and fry till they turn glassy. Then add the chicken pieces with the marinade, add the ground whole spices and let it simmer for about 30/45. Keep stirring it from time to time, turning the pieces around.

Once the chicken is almost done add the cream( if using cream) and finely chopped corriander.

Serve hot with a roti and pulao.

This is an ideal dish to make when you are entertaining. Very little cooking time and sure to be liked.

So Happy cooking and Bon Apetit!

I am now looking forward to the 50th milestone. Wish me good luck!

P.S: The photographs do not do justice to the dish. Will replace them with better photographs the next time I make this dish.

Friday, September 24, 2010

Everyday Menus


It helps to have a set of interesting, easy to cook recipes in your everyday menu.
Fish tops this list when it comes to non-vegetarian cooking. Given the increasing health awareness( no red
meat, no high cholesterol food) fish is gaining favor with an increasing number of people. For us Easterners, Fish is usually part of our regular/everyday food, quite like the daal chawal of our Northerner friends or the Sambhar rice of the South. My friend G says " Keralites feel quite the same way about fish", so no meat days are literally so, 'no meat' but you can have all the fish you want to. My Dad used to tell us this story about how fish in the cities alongside the Ganges was be referred to as " Ganga ka phaal", thus fit for consumption across castes and communities.

Sorisa Macha or Sorshe Mach is one of the more popular and well known fish dishes from the East. It requires very few spices and gets done in a jiffy. There are of course variations of this dish, some prefer to use Dahi with the mustard paste, there are others who add a tomato or dried mango( Ambula in Odiya) and some make it just plain. I have sampled the dish across numerous households and it tastes good every single time.

Sorisa Macha

Ingredients

Fish(Rohu or Katla): 6/8 pieces( Do pack your fish in individual portions and freeze, that way you just thaw one portion each time. Also helps "portion control" ). When buying fish try and buy one that weighs at least 2.5 kilos, would have fewer bones to tackle.
Mustard seeds: 2 tbsps
Garlic pods: 2/3
Green chillies: 4( as per your taste)
Curd(optional): 2 tbsp
Kala jeera/Kalonji: 1/4 tsp
Turmeric Powder: 1tsp
Salt to taste
Mustard oil: 1 tbsp( this tastes best with mustard oil however if you find the smell pungent use any refined oil)
Corriander leaves: Finely chopped, for the garnish

Method

Rub salt and turmeric powder on the fish and let it stand for a few minutes. Lightly fry them on a non stick tawa with 1 tsp of oil.

Soak the mustard for about half an hour and grind to a fine paste with 2 green chillies and 4/5 pods of garlic( again you could grind this plain without the chilli and garlic)

Next heat a flat bottomed pan( always cook fish in a wide, flat bottomed pan, that way the pieces won't break), add a little oil. Let the oil smoke. Then add the kalonji and slit green chillies. Add the mustard paste and let it simmer for a few minutes. Then add the fish pieces and let the fishes soak in the gravy.

Add a few drops of raw mustard oil to finish off the fish. Garnish with the corriander leaves. Serve hot with fluffy white rice.

While we were at Kolkata we used to eat Gobinda bhog rice with our fish curries. I loved this small grained rice with a rich, fragrant smell.

This fish preparation works well for entertainment too. However your guests need to like the mustard flavor.

Note: You could also add mustard paste to the raw fish, let it marinate for about 30 minutes and then microwave the same.

Bon Apetit and Happy Cooking!


Wednesday, September 22, 2010

Cakes...sorry no ale...


My husband says it is raining cakes at home. Suddenly there is this frenzied activity around the once forgotten oven( was being used only to make Bhapa Doi).

Raindrop's cake has triggered this renewed interest. So much so that I have tried making Raindrop's cake minus the chocolate powder and with Olive oil( quite nice- though using Olive oil makes it an " expensive cake"), I also tried a variation with less chocolate and more vanilla, written to all my foodie friends to send me their cake recipes ans share their baking secrets...

My friend G( I must tell you that some of the best cakes I have sampled have been made by G, she even inspired me enough to make batches of Christmas cakes one Winter) recently attended a microwave cookery class where she has learnt some nice, new dishes. She sent me this recipe for an eggless chocolate cake. G claims gets the cake gets done in under 10 minutes in a microwave. I have however made this in the conventional oven.

Eggless Chocolate Cake

Ingredients

Maida: 1.5 cups
Powdered sugar: 1.25 cups
Drinking chocolate/cocoa powder: 7 tsps
Curd: 1 cup
Oil: 1/2 cup
Milk:1/2 cup
Baking Soda: 1 tsp( In case you are making it in the conventional oven you could add a tsp of baking powder, I think it would make the cake fluffier)
Vanilla essence : 1 tsp

Method

Sieve the Maida, chocolate powder and baking soda( it is important that they mix well else the cake might not get done evenly). Mix the sugar and oil. Add curd, sugar and vanilla essence to the same. Next add the Maida to this mixture, slowly little by little, mixing well as you do so.

Transfer into a greased baking dish and microwave on HIGH for 9 minutes or bake at 220 degrees for about an hour( Initially with only lower coil and last 15 minutes with both upper and lower coils).

Serve hot with a dollop of vanilla ice cream. Makes for a really quick and easy dessert. In case you are making it well before your guests arrive make sure to microwave the cake for 30 seconds before you serve. Store in the refrigerator.

As Satarupa says in her book " The Workaholics' cookbook(Heavens bless her for that one), Ideas come to you once you get started. What seems so commonsensical now at one stage seemed very laboured. You slowly imbibe the tricks of the trade and let your nose/tongue lead you in kitchen. You learn to dress up an ordinary sponge cake with ice cream and if feeling really indulgent top it up with fresh fruits. You start tweaking recipes to suit your family's palate, in the process you usually better the recipe. You start eating simple but satisfying meals/desserts while actually spending less time in the kitchen.

Bon Apetit and Happy Cooking!


Monday, September 20, 2010

Chicken Curry for the Teenager's Soul


My older one( turned 13 a couple of months back) is very interested in cooking(read earlier blog titled Ken can bake- have chronicled his first attempt at baking a cake). He has been assembling starters for a while now, painstakingly making little cubes out of pineapple slices/cheese and stringing them on a toothpick. Ditto for salami and olives. I love the way he arranges the starters on a platter often with a little 'ketchup art' in the center. Apart from preparing them he is also quite focussed on making the dish visually appealing.

Been pestering me for a while to allow him to cook some " real stuff". Last week my maid assumed I would cook the chicken after I got back from work( I do that quite often so cannot blame the maid). For once I was not really in a mood to cook. So our young man got his chance. To make life a little easier for him I got him to pick up a packet of a ready to use curry paste. He followed the instructions to a T down to the cream and corriander garnish. The chicken curry was quite nice. The next day I made a chicken pulao with the leftover curry( Yep! cooking with leftovers). I must also tell you about the wine chicken(refer blog for recipe) and pasta salad( with apple, raisins and almond) that I rehashed into a lovely pasta dish for last evening's dinner. But more on that some other time.
For now a quick recap of the chicken curry. Typically I make a Chicken curry from scratch preferring the freshly ground ginger garlic paste to the bottled versions but I guess curry pastes are handy when you are rushed for time. Or when you have a lone non-vegetarian guest, the spread is largely vegetarian and you don't want to sweat over the chicken curry.

Quick Chicken Curry(Ideal for first timers)

Ingredients
Chicken: 1 kilo( recipe suggests you use boneless chicken but I find cooking chicken with the bones makes the meat more succulent)
Kitchens of India Butter Chicken Masala: I packet. I have used other brands like Parampara and they work equally well. I typically use double the quantity of the chicken suggested by the recipe as the curry gets too spicy for my taste otherwise.
Dahi: 2tbsp(optional)
Water: 2 cups( add more if you need a little more gravy)
Cream: 1 tbsp( for the garnish)

Method

Prick the chicken pieces with a toothpick and marinate the chicken pieces in the masala for at least half an hour. You could add a tbsp or two of Dahi to help tenderize the chicken

Then add two cups of water to the marinated chicken, transfer to a Kadai and let it cook covered for about 25/30 minutes, stirring occasionally.

Once the chicken is done, check the seasoning. Garnish with some cream and a sprig of corriander. Serve hot.

Goes well with hot chappatis and Pulaos.

Watch this space for an eggless chocolate cake( Thanks G for the recipe).

Happy cooking and Bon Apetit!


Saturday, September 11, 2010

Menu's for entertainment Part II of the series


We all entertain from time to time, some of us more than others. Many of us have the same guests coming over again and again, typically our closest friends/family. And while these are informal gatherings you still want to do something different, something exotic to make your guests feel special. Selecting individual dishes to prepare is easy but putting together an entire menu can be a tough job. Years ago my sister had given me a very useful tip: she said all your dishes need to "look" different. I use that as a basic filter when I am deciding on the recipes. Over the years I have also made a few combinations that go well together and repeat the entire meal for different set of guests with maybe a few minor tweaks here and there.

While putting down the entertainment menu there are a few basic guidelines that I follow:
  • Some dry and some gravy dishes( so if you are making a chicken curry do remember to make a daal/chole or malai kofta for the vegetarians).
  • Some dishes that can be made beforehand and taste as good the next day( the popular belief and I agree, is that non-vegetarian food tastes better the next day as it soaks in the flavor/masala). Sometimes you can make part of the dish earlier like if you making shepherd's pie make the basic mince earlier. You can assemble the dish shortly before the guests arrive. If using boiled potatoes in any of your dishes boil and cool them early. Ideally make your greens on the day of the party. Kheers made from scratch( not the quick milkmaid ones) take a while to prepare especially chawal kheer, so make it the evening before. Chilled kheer tastes yumm!
  • Some elaborate and some easy to prepare dishes. You don't want to be all tired and stressed by the time your guests arrive.
  • Some popular( tried and tested, you will rarely go wrong with choley, alu ki subzi, jeera pulao etc.) and some innovative ones(wine chicken, shepherd's pie). New recipes add to the excitement and help create a little drama around the meal. People are curious to know how you made it, a discussion follows where you explain the recipe in great detail. If the guest is a foodie like you she quickly notes it down and you can be sure she will try it shortly. I do that very often and so I am always on the prowl for new recipes.
  • Some heavy and some lighter dishes. So if it is a rice and mutton menu add lots of salad, curd/raita and maybe a basic bhaji.
  • The key ingredients across dishes should be different. If making dahi wada do not make a dahi chicken, try and make a palak chicken instead. That way each dish has a unique taste and the meal looks very appetizing( thanks sis for that really valuable tip).
  • If a menu has worked for you- guests were generally appreciative try and write it down in your little black book. Believe me you will not need to rack your brains the next time. But make sure you are replicating it for a different set of guests so write the names of the people you had invited alongside and keep updating this each time. Like today I had some friends over for lunch and the menu was: Traditional Pulao( with whole garam masala, cashew and raisins), paratha, mixed daal, stuffed parwal, vegetable navratan, alu matar, tomato chutney and bhapa doi. I thought the menu worked well and the next time I have vegetarian guests I will probably make the same in its entireity. Might add a dish or two.
The stuffed parwal is an interesting dish( my mother's recipe). I have never had parwal cooked this way in any other place. The story goes that we once had some unexpected guests and my mother did not have the time to make the regular stuffed parwal( where you painstakingly remove the seeds and stuff it with potatoes or masala or prawns or mince). So she did her own innovation. The guests loved it and since then it became a regular part of her entertainment menu. Off late I have added it to mine.

Mama's Parwal (No other name can capture the essence of this dish better)

Ingredients

Parwal: 8/10( about 2 per guest and a few extras)
Dhania powder: 1 tbsp
Jeera Powder: 1 tbsp
Chilli powder: 1 tsp
Salt: To taste, about 1 tsp
Haldi powder: 1 tsp
Amchoor: 1 tsp(optional)
Oil: 1 tbsp

Method

Place the parwal horizontally on the chopping board and make half slits along the body(refer to the picture, important to get this step right).
Mix all the masala together and stuff the parwal with the same. Allow the parwals to stand for about 30 minutes. Drain out any excess water.
Heat a non-stick frying pan, add the oil. Shallow fry the parwal, covering from time to time till done.
The dish is crisp on the outside and tender inside. Goes well with a basic rice, daal menu.

It is a very quick way to transform an ordinary vegetable into something exotic.

Happy Entertaining!


Friday, September 10, 2010

Something Fishy.....


I have always been a little hesitant to experiment with fish. Typically get the help to make it the traditional way. Rarely do I make fish when I am entertaining. If at all then it is the good old " sorshe mach(mustard fish)" or a variation of it called " Bhanga Besara( this one is boneless and a traditional Odiya dish, originates from Puri).

Also people are typically fussy about the kind of fish they will eat, many struggle with the bones and prefer having it either fillet cut or like it made into chops and cutlets. I am also scared that the fish being so tender might break midway through the cooking unless it has been fried as a first step in the cooking process.

But my family loves fish and it is a lot healthier than the other non-vegetarian options. We typically have it as patla jhola, sorshe mach or dahi macha. All three are quick to prepare and great to taste( more on those some other time).

With experience( and age) I have got brave and recently tried a new fish dish( after a lot of prodding from my older son who felt I needed to know a few continental fish preparations which I could serve with a soup, salad and sandwich meal). I tried an " oven fried" one- yes, there is a contradiction in the name. Let me explain, this is a baked dish which tastes quite like the fried variation. So a Low calorie fish dish. I served the dish with a dab of herbed butter which helped enhance the taste( though it did increase the calorie content :-) ) .

Oven Fried Fish

6/8 pieces of fish( I use Rohu, typically we buy a large Rohu weighing about 3.5 kgs, the fish has less bones which makes it easier to eat)
Lime juice: 1 tbsp
Garlic: 4/5 large pods crushed
Salt to taste
Pepper: 1 tsp, freshly ground
Egg: 1( I use the whole egg but you can make the dish healthier by using only the egg white)
Bread crumbs: 3/4 tbsps( to coat the fish).

Method

Marinate the fish in lime juice, salt and crushed garlic for 3/4 hours in the refrigerator(If you are in a hurry then 30 minutes should also suffice).

Beat the egg with some salt and pepper. Dip individual pieces of fish into the egg and then roll it over the breadcrumbs to coat the fish evenly. Arrange on a greased tray.

Bake for about 15 minutes( with both the upper and lower coils on) or till done. The outer layer is crisp and the inside is soft.

Top the dish with a dollop of herbed butter.

Herbed Butter

Ingredients

Butter: 2 tbsps
Garlic: 1 tsp, finely chopped
Corriander: 1 tsp finely chopped
Chilli flakes: 1/2 tsp
Lime juice: a few drops
Salt: 1/2 tsp

Whisk the butter with some finely chopped garlic, chilli flakes, finely chopped corriander, lime juice and salt.

Put a dollop over the oven fried fish while it is still hot.

Herbed butter goes well with regular bread too. Spices up an otherwise boring breakfast meal.

Yan promises to try more fishy dishes.

Bon Apetite!

Monday, September 6, 2010

Breakfast....will work as well for a main meal too


Years ago I remember visiting a dear friend in Pune. Some very fond memories of a weekend spent with this lovely family- open, warm and hospitable. I spent hours chatting with her Mom- A Maharashtrian who had married a Rajput. I remember aunty telling me that as a new bride the meal she had dreaded the most was breakfast. I had been pretty surprised to hear that till she had gone on to elaborate that lunch and dinner were typically Roti/Rice, Daal and Subzi( standard fare with multiple options to choose from) but when it came to breakfast there were limited options, time was at a premium and yet it was the most important meal of the day( to all you who skip breakfast, think again!). Thus the onus on you as the home-maker was to ensure that the breakfast you served was both wholesome in terms of nutrition and delicious in terms of taste. My friend's mom had actually worked out different breakfast options and stuck them on her refrigerator door. I thought that was really smart and some great planning( a tip that I always remember and have tried to replicate with some success). Spending 10/15 minutes planning the week's menu during the weekend can save you a lot of time during those rushed weekdays.

I made some Sooji Upma today. Very simple to make and can easily substitute a main meal like lunch or dinner. In fact I know of families who have moved to having Upma for dinner. Again another one dish meal and hence a favorite with me

Sooji Upma
(My friend G's recipe tweaked a little bit to suit the family palate)

Ingredients
Sooji: 1 cup. Roasted with 1 tsp of ghee( if you are feeling indulgent) or oil( even olive oil works well). Ideally dry roast the sooji the night before( The process of roasting the sooji takes about 10/15 minutes- needs to be roasted on medium flame with constant stirring. In the mornings you would want to save every minute you can). In fact each time you open a new packet of sooji, dry roast and store( this reduces the cooking time when making upma or kheer and also prevents the sooji from getting insects).
Vegetables: Potatoes, Beans, Carrots-finely chopped and shelled green peas, I like my upma with a lot of vegetables and tend to use close to two cups of veggies
Onion: 1 large or 2 small, finely chopped
Curry Patta: 10/12 leaves
Mustard seeds: 1 tsp
Oil: 2 tsps
Salt to taste
Water: 3 cups( Sooji: Water should be 1:3)

Method

Heat the oil/ghee in a nonstick kadai and roast the sooji for about 10 minutes on medium flame. Remove on to a plate.
Next heat 1 tsp of oil in a kadai, once the oil heats up add the mustard seeds and wait for them to sputter. Add the curry leaves, onion and fry till the onion starts looking glassy. Then come the vegetables. Again one way to fasten the process would be to cook the veggies with mustard and curry patta the night before and serve it as a meal accompaniment. Make your upma the next day with the leftovers(tops my cheat sheet, it is a lot of fun cooking with leftovers not to mention smart..after all half the job is already done).
Stir the vegetables, cover for a few minutes, add salt to taste. Since the veggies are chopped fine this should not take more than 10 minutes. Once the vegetables are done add three cups of water, when the water starts to boil add the sooji bit by sit stirring continuously so that there are no lumps. I like to add a few drop of lime juice to the dish( if you do decide to add some to yours do it at this stage).

Serve hot with a sambhar or chutney or tomato ketchup.

With a little bit of the preparatory work done from before this breakfast dish can get done in a jiffy.


Sunday, September 5, 2010

Vegetarian Cooking


Most of us who cook, serve and eat non-vegetarian food struggle when it comes to serving an entirely vegetarian meal. No, don't get me wrong. I do cook and eat a lot of vegetarian food. In fact I can very proudly claim to eat all vegetables. But it just seems way simpler to make a meal with a chicken curry or mustard fish thrown in. Non-vegetarian food seems simpler to cook and you rarely go wrong. In whatever form you serve the non-vegetarian dish people tend to relish it. Further the vegetarian accompaniments are treated as lesser mortals with hardly any attention being paid to them. So when you cook for a primarily non-vegetarian family you don't hone your vegetable cooking skills. They are there to curtail the meat eating and to make the meal more balanced.

Cooking vegetables, well seems a lot tougher. Most of my exotic vegetarian cooking is either with a mayo(egg less) dressing or a cheesy sauces or as stir fry's or with a heavy stuffing( Stuffed tomato, stuffed capsicum). Neither of this goes with the rest of the home cooked Indian food. Have been trying to learn a few new ones like Masala Stuffed Parwal, Sorshe and Poshto Parwal, Kadali Bada(Odiya) etc.

A friend of mine has elderly vegetarian house guests visiting her in two weeks. She wanted me to upload a few vegetable based dishes. This one is called Kasa Tarkari in Odiya( loosely translated it means Stir fry, though made quite diferently from a stir fry and tastes really different). Traditionally eaten with Puris and Parathas but tastes equally good with Roti. It has a " Makha Makha" consistency( neither dry nor gravy somewhere in between) and thus does not require an additional gravy dish or daal to go with it.

Kasa Tarkari( Serves 4)

Ingredients

Potato: 2 large sized ones
Ridge gourd( Janhi in Oriya and Jhinge in Bengali): 2
Pumpkin: About quarter of a small pumpkin
Parwal: 4/5
Brinjal: 4/5 small sized brinjals
Onion: 1 (optional)
Tomato: 1 large tomato
Panch Phoran: 1 tsp( This is a mixture of Methi seeds, Kala Jeera, Jeera, Saunf and Radhuni/Ajwain), would be available as Panch Phoran in most Modern Trade stores
Oil: 1 tsp
Finely chopped corriander leaves for the garnish
Salt to taste

Method

Chop all the vegetables to the same size( small cubes).

Heat the oil in a non-stick pan. Add the panchphoran and let it sputter. Next add the onions and saute for a while till the onion looks glassy. Add all the vegetables, salt and cook on medium flame. Keep sauteing the vegetables from time to time. Do NOT cover. The vegetables will give out water as they cook and the dish gets cooked in the same. No need to add extra water. The taste comes from the process of constantly moving the vegetables around( it is called "kasiba or "ghantiba" in Odiya). Cook till the vegetables are done. The dish will have a mish-mashed look. Ridge gourd and pumpkin provide it with a natural sweetness.

Garnish with finely chopped corriander leaves and serve hot with rotis.

Note: Do not cover and cook to speed up the process, would taste like boiled vegetables

Uses very little oil and is a really healthy dish.


Salads.....


Gone are the days when salads were referred to as "ghaas phoos". In fact now there are really interesting salads and we have begun treating them as main course. Go to a restaurant look at the menu and say : " I think I will just have a salad". Sounds familiar? Then you have company.

A salad, soup and sandwich( if the boys are feeling really hungry) is often our dinner on Winter weekends. Given that salads need to be prepared a little before they are actually served (for the dressing to get soaked up), makes for easy meal times.

This is a quick salad and most of the ingredients would be easily available at home.

Salad Meal

Boiled Pasta: About a handful. Cut up boiled pasta into smaller pieces.
Shredded chicken: Leftover curried chicken works well too. Debone the piece and shred them. It is a good way to use leftovers.
Raisins: A handful.
Almonds: 4/5, finely chopped
Apple: 1 apple( leave the peel on), chopped into small pieces
Vegetables: 1/2 cup, Carrots, onion and peas: Chopped and Boiled. In fact keep boiled veggies handy as you can use them to rustle up a meal in no time. Even Maggi( instant noodles) with some added vegetables makes for a wholesome meal.
Cucumber: 1/2 cup, with the peel, de-seeded and chopped finely
Tomatoes: 1, de-seeded and finally chopped( you can add the seed/pulp to another gravy dish)
Maynonnaise: 1 tbsp. Take about 1 tbsp of mayo and mixed it with about half a cup of milk. This helps you halve the quantity of mayo( my dietician's tip) and gives a ' free flowing consistency' to the dressing.
Herbs: Rosemary/Thyme/Oregano( take your pick, can also used mixed herbs). I usually save the Pizza toppings and use them in salad dressings, to season stir fry's.

Method

Mix all the ingredients together and toss the salad around.
Served chilled.
If you are a vegetarian you could skip the chicken and add more vegetables to the salad.

Can be served as a main meal or as an accompaniment.


If Yan can cook then Ken can bake....


Baking is often referred to as an "art". The very act of assembling all the ingredients, mixing them in the right proportion( this bit is really important, while baking a cake if you were to add a little more of this or a little less of that, you could end up with either a gooey mess or a rock hard cake) . Once you have mixed everything together you need to wait patiently for the magic to begin. The lovely smell of cake/cookies wafting through the house is an instant mood uplifter. Just what the Doc ordered for you when you were feeling low. I find anything to do with cooking therapeutic and baking especially makes me feel really good.

Unlike cooking where you kinda control every stage, thicken the gravy if it is too watery, add a boiled potato if the salt seems high, add some dhania/jeera powder if the dish tastes too bland, in baking you can do very little once the process of baking begins. Hence the excitement/anticipation: will the cake rise or won't it, will it be soft or hard, will the chocolate taste too bitter or just right, will it have an eggy smell or will the vanilla essence do the trick? I guess that is what makes the process of baking so much fun. At some level it almost seems like child's play( my thirteen year old has baked this one) but at another getting the recipe right seems like a challenge. There are recipes for triffle pudding which go: you need a badly made cake :-)

Raindrop had come home with a freshly baked cake about a week ago. The kids just loved it and gobbled it up in no time. They had been pestering me to get the recipe from her. Thankfully she obliged. The rest as they is for you to see and for us to sample.

Raindrop's Chocolate Cake

Ingredients

Maida: 1 cup
Castor sugar: 1 cup( about 3/4th cup of granular sugar when ground will give you a cup of powdered sugar)
Eggs: 4 large ones
Vanilla essence: 1 tsp( one of the few chocolate cake recipes that has vanilla essence as an ingredient, cake has a lovely chocolate flavor with a hint of vanilla)
Vegetable oil: 3/4th cup( I used Sundrop but I have tasted cakes made with Olive oil and they taste as good, so all you health conscious foodies you could try it with olive oil)
Cocoa powder: 1/2 cup
Baking soda: 3/4 tsp( I also added 1 tsp of baking powder though this was not part of the original recipe, soda helps the cake cook and baking powder helps it rise)
Amul butter: To line the tin

Method

This is the bit that I really love. Mix all the ingredients together( unlike other recipes which ask you to mix dry ingredients first, eggs separately and then fold in the flour bit by bit this is just one quick easy step and you are done). Transfer to a greased dish( grease the dish with some Amul butter).

Bake in the conventional oven at 200 degrees for about 45 minutes or till cake is down( In a microwave with convention cooking it should take about 25 minutes). I use a square oven. Baked with the lower coil only for about 30 minutes and then both lower and upper coils for the last 15 minutes.
Check if cake is done by inserting a toothpick or fork. The toothpick or fork should come out clean.

If serving it to children, decorate with cake toppings as shown.

Happy Baking! This one tasted delicious and is "almost gone" as I write this post.


Thursday, September 2, 2010

Menu's for entertainment Part I of the series


If like me you entertain very often then I am sure you are constantly trying out new dishes. To quote Karen Anand " Food opens difficult doors and helps make friendships we cherish". Incidentally her book titled Leans Cuisine Curries has an interesting assortment of recipes. Most of these are leaner versions of the original heavy, spicy, rich recipes. Lean cuisine I have discovered while being low on oil(many of her recipes don't use a drop of oil) are rich in flavors. Like her carrot and raisin salad which uses orange juice, lime juice, freshly ground cumin, crushed garlic and honey as the dressing. This one is a perfect accompaniment to spicy curries.

What most of us and our guests are also looking for are interesting, inspired Indian dishes which are flavorsome, delicious and 'allow us to breathe at the end of the meal'. So I attempt at least one new dish in the staple Pulao, Chole menu. Roasting, Steaming, Slow cooking, Poaching helps make the curries lean. Cooking with alcohol is yet another way to make your dishes "lean", always remember that the alcohol evaporates during cooking leaving nothing but a few calories worth of sugar and tons of flavor.

Wine Chicken

Ingredients

Chicken: Half a kilo
Onion: 2. quartered( you could also use shallots, about 10/12)
Mushrooms: 200 grams, quartered
Bay leaf: 1/2
Wine: 1/2 cup(I have a personal preference for white though red works equally well. Try and get a bottle of cooking wine)
Water:1/2 cup
Rosemary: 1 tbsp
Maida/cornflour: 1 tbsp
Salt to taste
Olive oil: 1tsp

Method

Heat oil in a non stick kadai and add the bay leaves. Next add the chicken and cook on high till the colour changes( this should take about 4/5 minutes).

Add all the ingredients( add the wine too) except the maida/cornflour. Cover and cook till chicken gets done. Another 10/15 minutes( you may choose to add the mushrooms midway through the cooking)

Next add the maida/cornflour dissolved in water to thicken the gravy and coat the chicken.

Serve hot with herbed rice and stir fry veggies.

A really light dish and the wine gives it a distinctive flavor.

This is a really quick dish and does not require hours of chopping/cutting vegetables or bhunoing the masala.

You happy, guest happy. I am "lovin" it.